I consulted my animator friend about some ways to go about making nice textures and file managing in Maya and learned a few new things that I wasn't aware of:
Firstly a useful tool is the file path editor (under general editors). This quickly helps to manage missing files and source images that are texturing your model, particularly if you are working across computers and the file paths change around a bit:
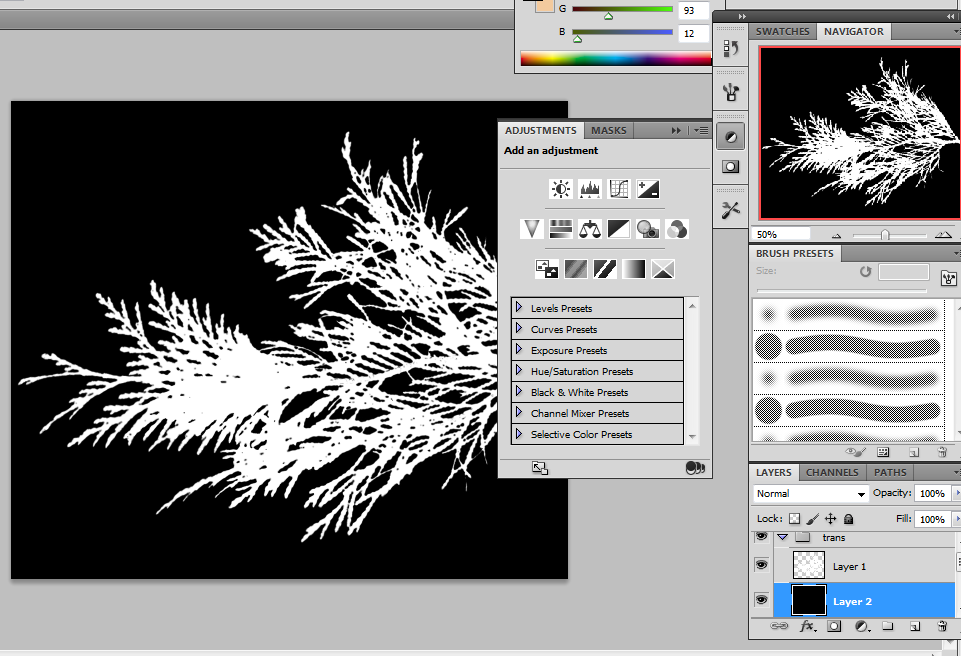
Secondly I learned that my leaves were lacking a bit of vibrancy because I want using an alpha image for my transparency. The alpha will assist in making the opacity of the leaves stronger than just using a base image. I had to take the image into Photoshop and create an alpha like so:
In addition for the colour of the leaves he suggested I change the background from white to a similar green to the leaves, This is so the grey haze around the leaves will no longer be visible:
The texture can then be place on the object through the hyper shade or attribute editor. However it's important to remember to break the connection between colour and transparency so that they don't try to use the same file path. colour should be linked to the green leaf and transparency should be linked to the alpha picture. The result looks more lively than my initial texture:
Finally I was also advised that it's common in industry to use the mia mental ray x pass node to texture objects with as it gives a better overall texture, so in future I will try to use this (can be created in the hyper shade editor):
Nicer render: